#LufkinLearns Invention Literacy Workshop – Wrap Up

Colleengraves.org (10)

Last week I was stoked to lead an invention literacy workshop for educators in Lufkin, Tx. Thanks to Rafranz Davis, I was able to teach this group about some of my favorite things: Invention Literacy, Makey Makey, and the Maker Mindset.

Inventor’s Mindset

One of my favorite things about this workshop is Tom Heck’s icebreaker where we talk about an inventor’s mindset. Here are some aha moments from that morning:

  • Inventors are not risk takers, but rather inventors take calculated risks.
  • An inventor looks at the world as something they can change or make better. They constantly ask the question, “How does this work?” or “How can I make this better?”
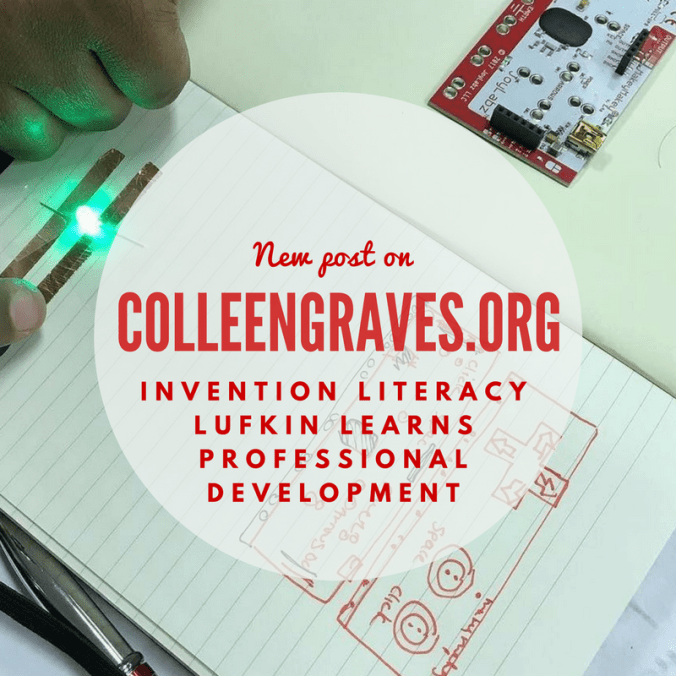
Paper Circuits

Since most of these teachers had never used a Makey Makey, I wanted to refresh them on the concept of a simple circuit. ( I packed all of the materials needed in these handy photo storage boxes so resources were distributed easily to each table group.)

I loved that after getting a working circuit, learners begin to find other applications. Rafranz hacked her simple circuit into a parallel circuit, and most of the table groups begin to make holiday cards.


Fairy Tales

After circuits, we began to dabble in the Sketch it Play it activity. (Sketch something with a pencil, hook it up to Makey Makey and play a piano.) Normally I have my educators make blackout poetry, but since this was a room full of awesome elementary educators, I adapted this part of the workshop to creating illustrations for our favorite fairy tales.

Switches

A lot of educators never get #beyondthebanana with Makey Makey, so even though they only just started playing with this little invention kit, I had educators make a switch. For me, I didn’t know how to make a switch for Makey Makey for almost A YEAR after the first time I played with one. Making switches and finding ways to make everyday things into switches, is one of the most inventive and fun ways to create projects with Makey Makey.  (In fact, Aaron and I made a whole book of wacky projects based on this concept!)

Invention Literacy

I spent a lot of time during this workshop sharing how I incorporate invention literacy into my library programming. If you haven’t read these posts, you should check them out!

Design Challenge

The last part of the day is MY FAVORITE PART! The workshop participants are challenged to make something useful by going through the design thinking process. They have a limited amount of time. A design challenge is a great maker activity, but there are three important things that have to happen for a successful challenge.

  • Relationships- Since the group worked through so many things together on this day, they felt comfortable working on a more challenging project together. If you were to attempt a design challenge straight out of the gate, it might not be as successful.
  • Open Ended/open-middled/open beginning – A challenge should be open ended enough so that every group creates a different product at the end of the designated time. You can open any part of your directions. For more on the open middle and open beginning concept by Jay Silver, read the Challenge Based Learning Book.
  • Time Constraint– The time constraint is what helps makers focus and get finished (hopefully) with their project. If a full working prototype doesn’t happen, proof of concept is okay too!

Check out all the awesome ideas these educators had:

Group 1

View this post on Instagram

Portable Christmas tree ! #lufkinlearns

A post shared by Colleen Graves (@makercolleengraves) on

Group 2

Group 3

Group 4

Group 5

If you’d like to bring me to your school district, conference, museum, or other informal learning space for this workshop, please use this contact form below.

I host other maker education workshops too! Browse my workshop menu, or contact me to develop a workshop based on your needs.

← Back

Thank you for your response. ✨


Adapting #Scratch + #MakeyMakey poetry for Elementary Makers


Colleengraves.org (1).pngIf you’ve been following my blog, you know I’m a bit over the moon for Makey Makey Poetry. (See initial post, follow up post, and resource page.) So when 4th grade teacher, Mrs. Harvey, asked me about ideas I had for poetry in the same breath as mentioning that circuits were coming up, well… I couldn’t help but share one of my favorite activities of creating interactive poetry with Scratch and Makey Makey. My 4th grade teachers were unsure it would work, but they were willing to take a risk! Thanks, 4th grade team!

I knew I needed to hack this poetry project for our elemakers so the class would still flow in our short time frame. Plus, our wonderful and awesome QUEST teachers Mrs. Stewart and Mrs. Koller volunteered to come assist during each class. Before the classes came to the library, the 4th grade teachers read “Yesterday I had the Blues” by Jeron Frame. Using the poem as inspiration, students created their own poem by focusing on colors and mood. Students sketched drawings in class to accompany poetry, then came to the library with poems and drawings in hand.

Upon arrival, I shared a simple pencil drawing of arrows, and touched each arrow to show students it was just normal paper. Then I slowly hooked up alligator clips to my drawings  magician style so that the drawings could become interactive.

The awesome of Makey Makey wowed the students.

However, I wanted students to see that it isn’t magic, and that a simple program controlled the drawing. I hooked up the wrong clips to the wrong drawings of arrows so that I could tap the up arrow and the computer would say “down.” I did this to explain that computers aren’t that smart without people telling them what to do! This shared the importance of understanding how to write really simple programs in Scratch.

Since my students did not have previous Scratch or Makey Makey experience, I also wanted to frontload the concept of block-based programming with some hand made manipulatives. You can adjust and print your own thanks to the awesome Scratch educator community!

Luckily for me, my QUEST (GT teacher) Mrs. Stewart was equally excited and offered to help cut and laminate these blocks AND come assist with 4th grade classes in the library all week!

Once students were logged into the computers and signed into Scratch, (I made a Scratch teacher account and created links for each teacher on the library homepage), I showed students the basic layout of Scratch and how to access the “Event” palette and the “Sound” palette. I demonstrated how to drag the big blocks together and asked them to use expo marks to change the setting on the blocks and then drag them together on the table until they “clicked.”

Before going too much further, I shared how to access the “Sounds” tab for recording their own poetry.  Since they already had a simple program at that point, the library was taken over by Scratch cat meows! I let them get the meows out of their system, and then asked them all to click the “black x” on the sound. (They didn’t know it would delete the cat noise! HA!) I quickly shared how to record and edit sounds, but at that point they were eager to get started. We told students to spread out and find quiet spaces around the library to record their poetry.  (Telling them they were free to tuck into library shelves.) I did make a point of telling students not to “audio-bomb” each other and keep their voices low. Most classes agreed with this common courtesy!

Once recording was finished, students were told to meet back at the “pink” tables in the library to begin the MAKEY MAKEY MAGIC! (If you don’t have them meet back at a central location, Makey Makeys end up on the floor and alligator clips end up EVERYWHERE.)

Now, the best part about the big printed Scratch blocks….. When students came back to the tables, they quickly figured out how to make their program in Scratch and how to control it with Makey Makey! Plus, if someone was confused, I was able to remind them about the big blocks on the table. Students that got it quickly, LOVED being able to help their peers with Scratch and Makey Makey. By the end of the week, we were able to get every student in class playing their poetry with Makey Makey.

As with previous iterations of this lesson, one of my FAVORITE things was hearing students use emotion and tone in their poetry readings. There is just something about creating poetry in Scratch that engages kids with emotive readings of text. (It is not often that students engage with reading poetry with strong emotions!) Plus, it was exciting to see how stoked kids became about poetry by adding this technological piece.

If you’d like to witness a live demo of teaching students how to create this interactive poetry, I’ll be sharing my Makey Makey madness as part of the SLJ Maker Workshop  on Oct. 12th!

Until then, please share your own #MakeyMakeypoetry with the hashtag on Twitter!

P.s. If you want to see and hear your students poetry, make sure they hit “share” before they leave for the day! Otherwise, their Scratch games will not be shared in the teacher account.