#CapMakerFaire and #NationofMakers Wrap Up – The Future of Making

Last month, I had the distinguished honor of being invited to speak in DC before the Capitol Hill Maker Faire as part of the week long celebration of making.

Congressman Takano opened the daytime panels by discussing why he helped co-found the Congressional Maker Caucus. What was interesting to me, were some of the constants I’ve observed from working with new makers and working with companies like Makey Makey and littleBits. Here are some of my favorite sound bites from Congressman Takano:

  • “New technology scares the general public.”
  • “It is not simple to label, but it is easy to recognize the energy of this movement.” (In regards to the maker movement)
  • “Are we ready to take making to the next level?” (and how?)
  • “Each of us can be CREATIVE and INNOVATIVE regardless of age.”

Throughout the day, listening to experts from the maker movement on these amazing panels organized by the IMLS, I heard 3 big concepts reiterated across the varied fields. (See the full line up of panel speakers here.)

  • Inclusivity (The maker movement is for EVERYONE)
  • Accessibility and democratization of tools needs to happen
  • Community based = Maker Success
  • Open Access and sharing are key

Community-Based

When founder of Make Magazine Dale Dougherty, asked the first panel how we can expand and grow makerspaces in schools and libraries across America, this panel had a powerhouse of answers.

Screen Shot 2016-07-05 at 7.26.45 PM.png

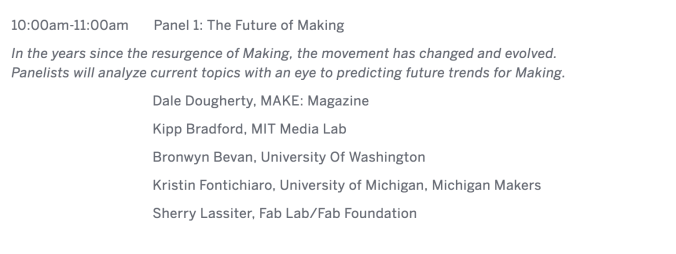
Sherry Lassiter stressed the importance of communicating, collaborating, and cooperating to build universal access for makers.

Capitol Hill 1_colleengraves

“Making is not about tools, but PEOPLE and the EMPOWERMENT that comes from making something with your own hands.” Sherry Lassiter

She also stressed the importance of letting students be the maker mentors for other students. (Something I’ve seen among my own students at both school makerspaces I’ve started. Letting students LEAD the learning let’s students OWN the learning.)

Kristin Fontichiaro, clinical assistant professor and faculty founder of the Michigan Makers project for elementary and middle school makers in under-resourced schools brought up many important points I’ve been focused on as of late.

  • Our “low income students are filled with high creativity”
  • “Rural communities have very different budgets and access.  They are diverse, rural, and underserved.”
  • “Some rural communities have no cell, data or Internet access.”

Bronwyn Bevan, currently Senior Research Scientist at University Of Washington (previously Director at S.F. Exploratorium) discussed the benefits of learning through making. 

  • “It encourages entrepreneurship.”
  • “Engineering is collaborative.”
  • “Hands-on STEM is the next generation of K-12.”
  • “Science is the process of learning about the world.”
  • “Tinkering is open ended and has no blueprint.”
  • “Self directed learning helps students LEVEL UP.”
  • “Educators need to create a culture of “What if?”
  • “Students need to feel empowered and supported to ask questions.”

Kipp Bradford, a research scientist at MIT Media Lab, discussed how one of the most essential aspects in the success of the future of making is that, “we need to connect our makerspaces with communities and make tools accessible.”

He also stressed that “engineering is about making the world better for humans. It is important that in all the push for STEM, we don’t lose humanity.”

The next panel continued to stress accessibility and community-driven makerspaces. Greg Mickells of Madison Public Library said something I’ve been trying to communicate everytime I’m asked to speak. “Making is not about the stuff, we should focus on people.” At the Bubbler at MPL the goal in making is “to learn, share, and create.” Patrons are encouraged to “design like MAD” in this “dynamic library environment.”

Accessibility

So how can we increase accessibility to maker education? Should we put a makerspace in every school library and public library? Could you imagine how awesome that would be?

Lisa Brahms of Make Shop Pittsburg part of the Children’s Museum of Pittsburgh proclaimed, “the point of a library is to point people towards resources.” So doesn’t that mean that a library is a natural fit for a makerspace?

I loved how Kipp Bradford went ahead and stated the obvious, “Why don’t we just make the investment to fund innovation?” What is holding us back?

Screen Shot 2016-07-06 at 10.05.44 AM

It is pertinent however, that all schools, libraries, and public officials realize that it isn’t as easy as just creating a space and letting people in. As design education evangelist  Jeremy B. Carter from Autodesk states, “You can’t just open doors, you have to MAKE it happen.”

Building a culture of creativity and making takes work. You need a facilitator (or librarian ) to help grow your makerspace. You cannot expect a successful space if you do not have a passionate maker leader driving your maker bus.

Training for teachers and staff should focus on equitable and culturally responsive makerspaces. When instituting a new makerspace, administration and teachers should discuss building a culture of making and inquiry that builds a maker community in their school. Getting students involved in the process will also drive your makerspace success and allow students to become leaders and experts in the space from the get go.

Capitol Hill 3_colleengraves

Education Panel

I had a blast sharing my own passion for making in education with the all star panel organized by the IMLS:

Screen Shot 2016-07-05 at 7.26.37 PM

Once again, our panel brought up the need for involving the community – and not just the local community, but expanding to the global maker community. We also stressed the importance of process over product, failing forward (or as Congressman Takano put it, working from the “failures you learn from and successes you build on.”

Don’t be afraid to learn alongside your students. Even if it means exposing yourself to failing in front of them. This is a good thing. Kids need to see us fail and move on.

Throughout the course of the day, I heard a lot about marketing, manufacturing, and entrepreneurship, and while I appreciate that the maker movement facilitates these things….  it is not why I believe that making in education is relevant and indispensible.

You see, I used to have an Etsy shop and make things for others, but what I love about the maker movement is not making things for others.

What I love is teaching others to make things for themselves. That’s why I enjoy being an educator even more than being an artist or a maker. I think a lot of this stems from my love for the transcendentalist movement founded on the ideas by Thoreau and Emerson who believed that humans should think for themselves AND be self sufficient.Capitol Hill 4_colleengraves

While I would love for my students to grow up and invent the next big thing, thinking that all of these kids caught up in the maker movement will grow up to be the next Elon Musk is a bit far fetched. That is like assuming all students who take math will grow up to be mathematicians.

Instead, we should focus on the fact that these engaging activities are essential skills for all of our students to gain!  Making teaches students to work collaboratively in ways that our curriculum often doesn’t. Many times, our students leave our schools lacking the ability to problem solve, work in a group, act as a leader, and deal with failure because it isn’t in the curriculum.  

The good news is that these are all skills students can build through making.

Evening Maker Faire

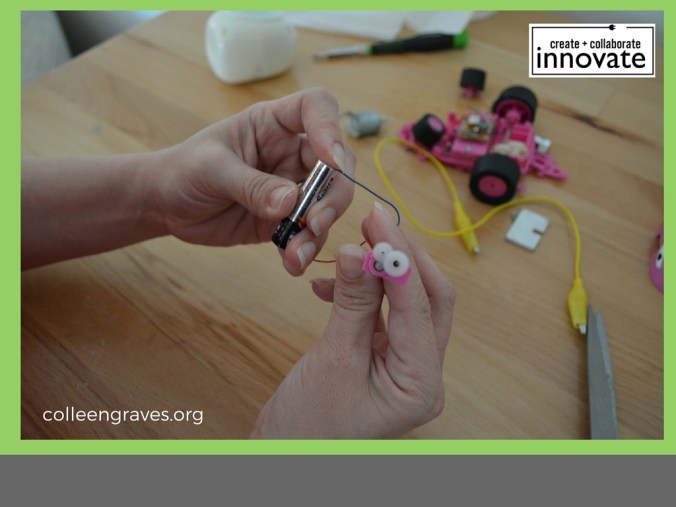
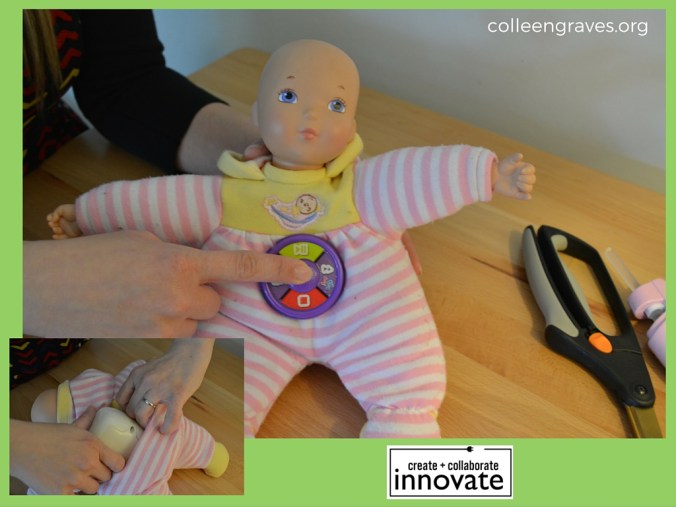
In the evening, Aaron and I taught Maker Faire attendees how to make their own simple paper circuit and even how to make a simple DIY switch. One of the highlights for me was teaching fellow Dentonite and Congressional Science Fellow David Visi how to make a paper circuit. Another highlight was watching Aaron teach a gaggle of Girls Scouts about circuitry. Thanks so much to Chibitronics for providing some circuit stickers and if you are interested in our templates they are in our upcoming book – The Big Book of Makerspace Projects to be published in October 2016.

Thank you again to the IMLS for organizing such a great day! It was a blast and wonderful experience and I hope I am able to attend the next one!


Nation of Makers- Family Project – Take Apart and Rebuild Toys

It’s the National Week of Making! Let’s make something! The best way to become a maker is to immerse yourself in making and institute some family maker time. Aaron Graves and I have a whole book of makerspace projects you can do with your family, your classroom, or your library, but since it isn’t out yet, we thought it’d be fun to kick off this week with some fun maker projects for the whole family. First up? One of our favorite ways to teach kids to tinker and get creative is by making Franken-prototypes. Plus, un-making is a great way to learn how stuff is made and a fun way to get creative when you think you don’t have many resources. Anybody can do this project with relatively no money spent! Let’s get making!

Collaborative Project and Post written with Aaron Graves the #superlibrarianhubs

Take apart and rebuild: Toys

Supplies

Materials Description Source
Assorted Toys Toys with buttons and electronic elements electronic car, stuffed animal,etc Thrift Store
Safety Equipment Safety goggles, Multimeter, Wire Nuts  
Take apart Tools Screwdrivers, Wire strippers, Wire clippers Hardware Store
Connectors Hook-up Wire, test leads, tape, hot glue gun  

Ever wonder what is inside that kids toy that makes it make music only when you tilt it? Or how a kid’s piano works? Or what is inside a remote control car? Now is your time! If you are in a library or school, have your makers bring old, broken, or thrift store toys to your makerspace and host a take-apart hour! If you want to do this with your kids, have them choose toys they won’t get upset about taking apart. Since you won’t have the exact same toys as we do, just use this project as a guideline for things to look for when you are taking apart your own toys.

Take Apart Rules

1.     Don’t Force anything.

2.     Always use the right tools number

3.     Be safe! Wear gloves if needed.

4.     Go slow.

5.     Don’t break anything

6.     Challenge yourself: Can you put it back together and it still work?

Step 1: Gather toys

Children (and sometimes their parents) outgrow some toys rather quickly. Sometimes toys are bought that don’t work well in the first place. Look for toys that don’t work or that you want to give a new life. Do not buy new toys to take apart as that would defeat the purpose of this project! You can see in our assortment of toys we are working with in this project: a broken remote control car, an annoying musical baby cellphone, a discarded baby doll, and a white giggle box my children ripped out of a toy it came in years ago.

Classroom Tip: Request old or busted toy donations from parents and patrons. Scour thrift stores for older electronic toys preferably from before 2002 as the guts were more fun back then! Don’t buy brand new toys to take apart.

Step 2: Take out batteries, unscrew all screws

Always, always, always, take out the battery first! Never use a screwdriver to take apart a toy with the batteries in tact! Begin unscrewing. You’ll find that some kid toys are actually quite difficult to take apart. You’ll need an extra long tiny screwdriver to remove screws. Some also have hidden screws beneath covers. So carefully remove pieces and unscrew more screws! (And even though it is tempting, always remember take apart rule #1- Never force anything!)

family project- colleengraves1

Take out batteries/ Remove covers

Step 3: Identify electronic elements

With some toys it won’t take long to find cool components. Upon removing the case of this pink car, I found a tiny 1.5 motor shown unattached in the picture below. This type of motor usually has a counterweight on the end that we could use to make a great toothbrush bot. Since this one doesn’t have a counterweight, we could also use it in a project to rotate a very small wheel in a car or add a counterweight to make a vibrobot! You can also see a DC Motor still held in place by plastic and screws.

family project- colleengraves2

Tiny 1.5 V Motor, DC Motor, and WHEELS!


By removing the cover of the annoying baby cellphone, you can see the pretty circuit board with flashing LEDS and a speaker that were lurking under the cover. We’ll find a way to make a mash up with these blinking LEDs.

family project- colleengraves6

Step 4: Salvage parts to make something new

So what can we do with all of this cool stuff? Let’s free the motor on the RC car and start brainstorming. First, cut the wires attaching the motor to the circuit board. Since we want to use the motor again, but not this circuit board (the car didn’t work anyway!) we are clipping close to the board so the wires stay long coming off of the motor. That way we can reuse the existing wires on the motor.

family project- colleengraves 3

family project- colleengraves5


Step 5: Test freed components

We decided to make sure these components work before putting them in anything else. You can test them on a small battery by holding the correct leads to each positive and negative end as we did in the picture below. Now we’ve got some useful motors, wheels, and blinking LEDs controlled by a circuit board.

family project- colleengraves4

What should we do with them? We love the blinking lights on the kid’s handheld toy, but the music is a bit irritating. Could we clip the speaker and still have the LEDs work via the integrated buttons? We clipped one speaker wire and tested to see if the LED lights still worked without the speaker! Yes! Success.


Screen Shot 2016-06-17 at 11.14.59 PM.png

Clipping Speaker Wire

We tested the motor from the RC car to see if this board could control it. Unfortunately, it powered the motor but would not function as a switch without some considerable work. What else do we have on hand? Why not the original switch and battery pack from the car? Or even the remote control? We decided to salvage the many buttons for the remote and use them in a later project. To use the original switch and battery pack from the car, we had to clip the unwanted circuit board (see below). Now we have a clear spot to attach our DC Motor positive wire and negative wire to a pre-wired switch!

family project- colleengraves 8

Step 6: Making Something New

Everybody loves dancing animatronic dinosaurs, right? Our 7-year-old found these dinosaur figurines at the bottom of her toy box. Why not animate them with the components from our non-working toy car? Little plastic toys like this usually have clear seams and are hollow which makes it a great toy to hack. Using a coping saw we cut this dinosaur along the seam (see below). You could use a box cutter, but a coping saw allowed us to quickly chop this dino in half without fear of breaking a razor blade. This dino also had a tiny hole already visible, so using that to our advantage, we used a screwdriver to widen the hole so we could places the wires for the DC motor through the hole.

family project- colleengraves 9

Digging Up Dinosaurs

Step 7: Hook-up Wire

We cut about a 6” length of hook-up wire, so we could wire the DC motor to the switch on the car body. Before placing the wires through the hole, make sure you strip the end off so you have about a half inch of exposed wire for making connections. Pull wires through Disco Dino and twist red wire to red wire and cap exposed wires with a wire nut. Connect black wires together by twisting with your fingers and covering with a wire nut. With the exposed ends of your freshly cut hook-up wire carefully placed inside Disco Dino, attach the wires to the DC hobby motor as below. Typically, with a small DC motor like this, the way you power up the wires changes the direction of the motor. So you can’t do it wrong! If you hook up one way your Disco Dino will spin his head to the left and if you hook it the other way, he will spin his head to the right! Go ahead and hook the red wire to one end and the black wire to the other. Make sure your motor will fit in your toy.

family project- colleengraves11

Hook Up and Cover Up


Classroom tips: Cover exposed wires with wire nuts, heat shrink, or electrical tape. Keep safety as part of the lesson and do not leave exposed wires exposed when working with children!

Step 8: Hide the Motor

Using popsicle sticks, we made a “seat” for the motor so it can rest in the center of Disco Dino’s tummy. By filling in the gaps with hot glue, you can ensure the motor won’t move around once you turn your dino on. (Because he is going to be DANCING A LOT!)

You’ll also want a sturdy spot inside Disco Dino’s top half. Using a popsicle stick, we made another seat for the piece you will use to hold the head onto the motor. We found a small round piece inside of a VCR that happens to fit our motor almost perfectly.  Aaron used his hot glue trick again so that the center of this “piece” would rest comfortably in the center of Disco Dino’s upper body.

family project- colleengraves12

Pop it like it’s hot!

Step 9: Let’s Dance

Will Disco Dino dance? We stuck the top half to the bottom half and flipped the switch on the car body! It works! However, it lacked something. We used the blinking LEDS from the handheld baby toy to create a disco scene for Disco Dino. By holding the blinking toy in place with a roll of duct tape we can hide the electronics behind a disco drawing.  Disco Dino is now ready to dance!

family project- colleengraves13

Step 10: Make more stuff

Remember our push button giggle? And the front of our discarded baby cellphone toy? Let’s make one more “frankentoy.” Our 7 YO really wanted to make a giggling blinking robot, but she found a quick fix with this discarded babydoll. We simply cut the back of the doll near a seam so we could insert our giggling electronics (See below). Made room for the giggle box and placed giggling electronics inside. We hot-glued the button from the handheld toy on the front of baby to give users a giggle button! Now when our 7 YO pushes the button and she’s got a great new giggling toy. She never cared for this babydoll before, but she loves it now! You might find giggle buttons like this inside many toys at the thrift store including “Tickle Me Elmo.” Now go find some old toys and make something new!

family project- colleengraves 14


Challenges:

  • What else can you make with the tiny motor?
  • What other things could you make with your DC hobby motor?
  • Could you wire up Disco Dino’s motor to a different toy so the control is more mobile?

More Resources

  • The Tinkering Studio is a great resource for learning more about what they call #toydissection! They host amazing workshops all around the world teaching people how to tinker with everyday materials in new and unusual ways!

What will you make? Tweet us, leave a comment, or use the hashtag #bigmakerbook to share your creations on our Community Project Page!