It’s the National Week of Making! Let’s make something! The best way to become a maker is to immerse yourself in making and institute some family maker time. Aaron Graves and I have a whole book of makerspace projects you can do with your family, your classroom, or your library, but since it isn’t out yet, we thought it’d be fun to kick off this week with some fun maker projects for the whole family. First up? One of our favorite ways to teach kids to tinker and get creative is by making Franken-prototypes. Plus, un-making is a great way to learn how stuff is made and a fun way to get creative when you think you don’t have many resources. Anybody can do this project with relatively no money spent! Let’s get making!
Collaborative Project and Post written with Aaron Graves the #superlibrarianhubs
Take apart and rebuild: Toys
Supplies
| Materials | Description | Source |
| Assorted Toys | Toys with buttons and electronic elements electronic car, stuffed animal,etc | Thrift Store |
| Safety Equipment | Safety goggles, Multimeter, Wire Nuts | |
| Take apart Tools | Screwdrivers, Wire strippers, Wire clippers | Hardware Store |
| Connectors | Hook-up Wire, test leads, tape, hot glue gun |
Ever wonder what is inside that kids toy that makes it make music only when you tilt it? Or how a kid’s piano works? Or what is inside a remote control car? Now is your time! If you are in a library or school, have your makers bring old, broken, or thrift store toys to your makerspace and host a take-apart hour! If you want to do this with your kids, have them choose toys they won’t get upset about taking apart. Since you won’t have the exact same toys as we do, just use this project as a guideline for things to look for when you are taking apart your own toys.
|
Take Apart Rules |
| 1. Don’t Force anything.
2. Always use the right tools number 3. Be safe! Wear gloves if needed. 4. Go slow. 5. Don’t break anything 6. Challenge yourself: Can you put it back together and it still work? |
Step 1: Gather toys
Children (and sometimes their parents) outgrow some toys rather quickly. Sometimes toys are bought that don’t work well in the first place. Look for toys that don’t work or that you want to give a new life. Do not buy new toys to take apart as that would defeat the purpose of this project! You can see in our assortment of toys we are working with in this project: a broken remote control car, an annoying musical baby cellphone, a discarded baby doll, and a white giggle box my children ripped out of a toy it came in years ago.
Classroom Tip: Request old or busted toy donations from parents and patrons. Scour thrift stores for older electronic toys preferably from before 2002 as the guts were more fun back then! Don’t buy brand new toys to take apart.
Step 2: Take out batteries, unscrew all screws
Always, always, always, take out the battery first! Never use a screwdriver to take apart a toy with the batteries in tact! Begin unscrewing. You’ll find that some kid toys are actually quite difficult to take apart. You’ll need an extra long tiny screwdriver to remove screws. Some also have hidden screws beneath covers. So carefully remove pieces and unscrew more screws! (And even though it is tempting, always remember take apart rule #1- Never force anything!)
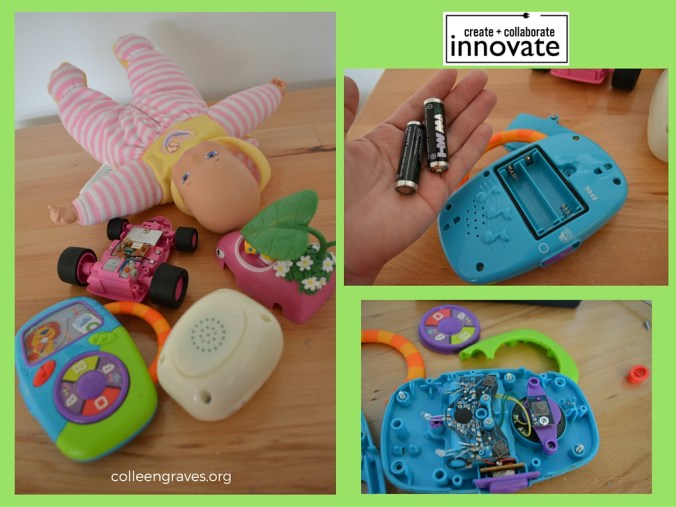
Take out batteries/ Remove covers
Step 3: Identify electronic elements
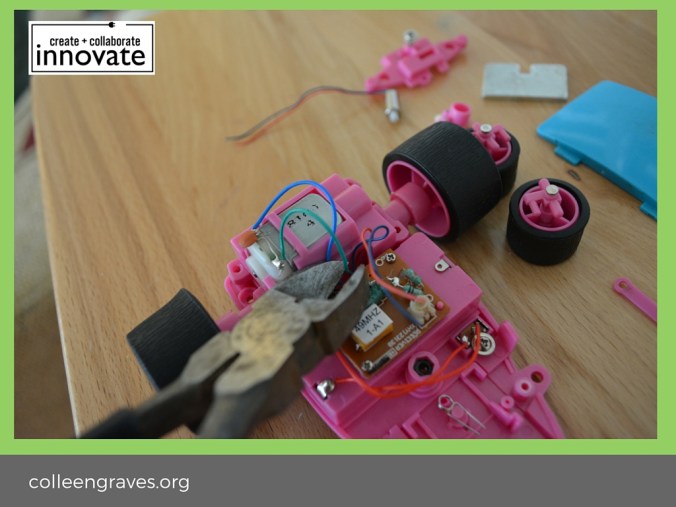
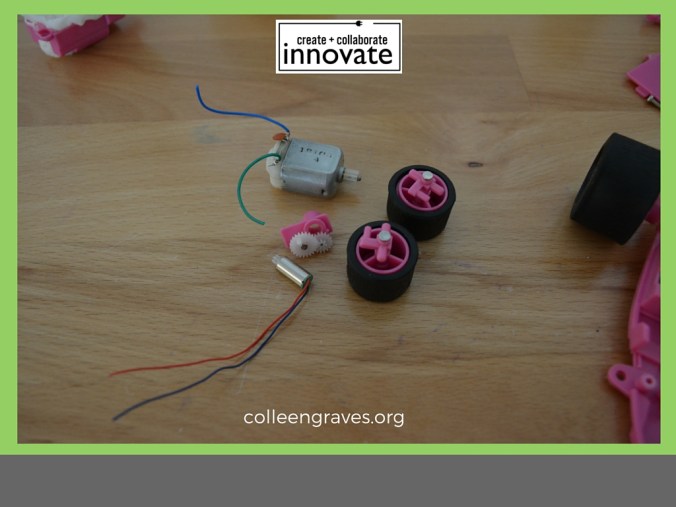
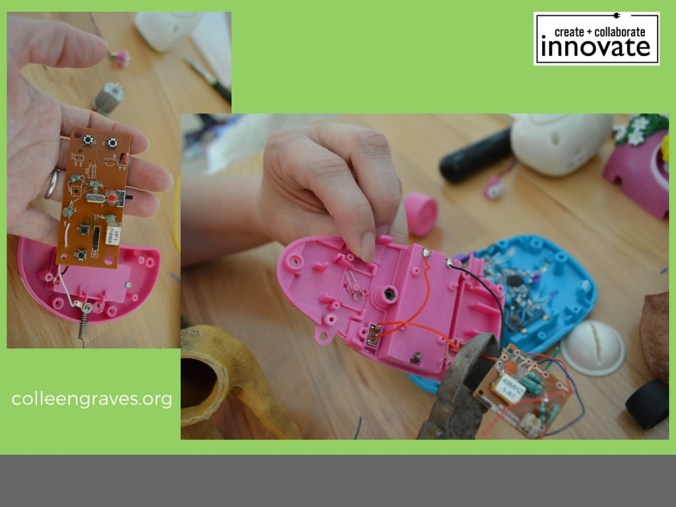
With some toys it won’t take long to find cool components. Upon removing the case of this pink car, I found a tiny 1.5 motor shown unattached in the picture below. This type of motor usually has a counterweight on the end that we could use to make a great toothbrush bot. Since this one doesn’t have a counterweight, we could also use it in a project to rotate a very small wheel in a car or add a counterweight to make a vibrobot! You can also see a DC Motor still held in place by plastic and screws.
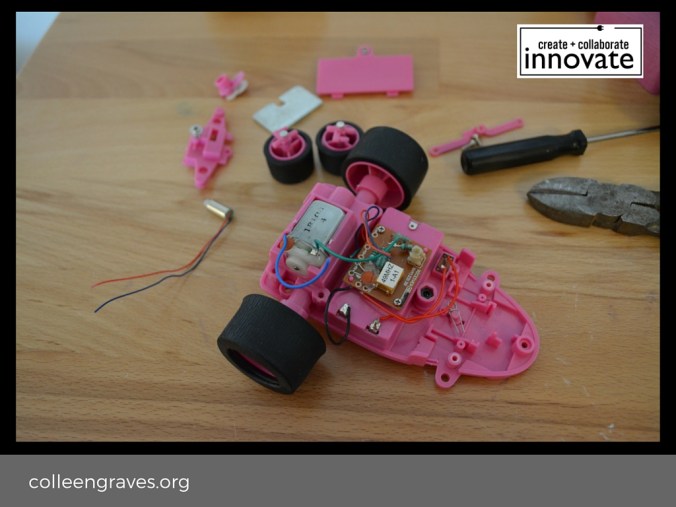
Tiny 1.5 V Motor, DC Motor, and WHEELS!
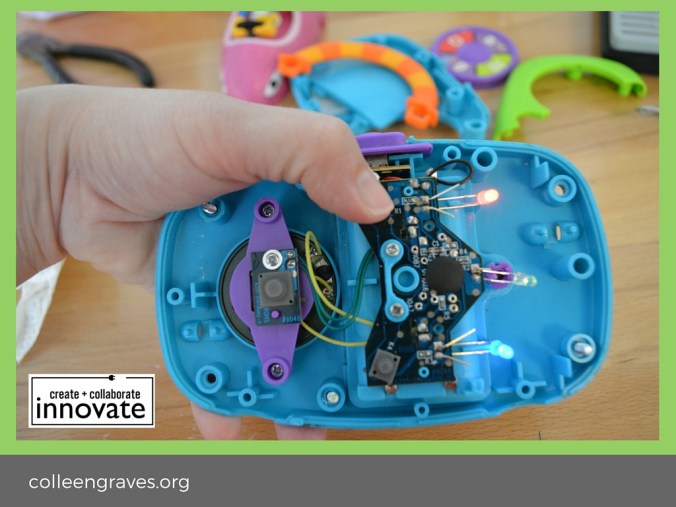
By removing the cover of the annoying baby cellphone, you can see the pretty circuit board with flashing LEDS and a speaker that were lurking under the cover. We’ll find a way to make a mash up with these blinking LEDs.
Step 4: Salvage parts to make something new
So what can we do with all of this cool stuff? Let’s free the motor on the RC car and start brainstorming. First, cut the wires attaching the motor to the circuit board. Since we want to use the motor again, but not this circuit board (the car didn’t work anyway!) we are clipping close to the board so the wires stay long coming off of the motor. That way we can reuse the existing wires on the motor.
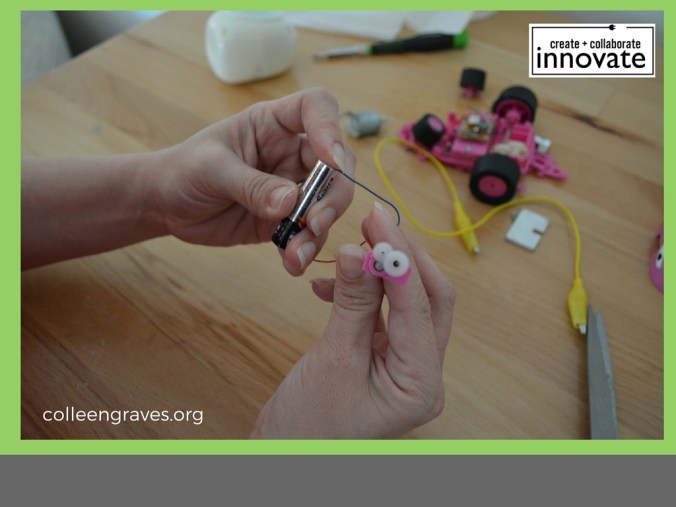
Step 5: Test freed components
We decided to make sure these components work before putting them in anything else. You can test them on a small battery by holding the correct leads to each positive and negative end as we did in the picture below. Now we’ve got some useful motors, wheels, and blinking LEDs controlled by a circuit board.
What should we do with them? We love the blinking lights on the kid’s handheld toy, but the music is a bit irritating. Could we clip the speaker and still have the LEDs work via the integrated buttons? We clipped one speaker wire and tested to see if the LED lights still worked without the speaker! Yes! Success.
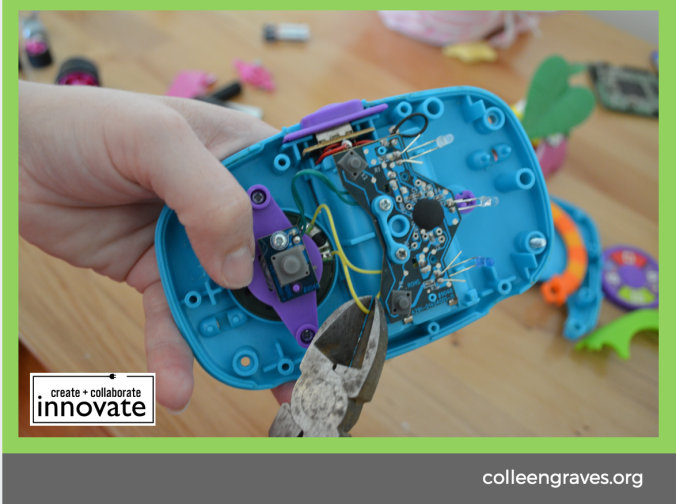
Clipping Speaker Wire
We tested the motor from the RC car to see if this board could control it. Unfortunately, it powered the motor but would not function as a switch without some considerable work. What else do we have on hand? Why not the original switch and battery pack from the car? Or even the remote control? We decided to salvage the many buttons for the remote and use them in a later project. To use the original switch and battery pack from the car, we had to clip the unwanted circuit board (see below). Now we have a clear spot to attach our DC Motor positive wire and negative wire to a pre-wired switch!
Step 6: Making Something New
Everybody loves dancing animatronic dinosaurs, right? Our 7-year-old found these dinosaur figurines at the bottom of her toy box. Why not animate them with the components from our non-working toy car? Little plastic toys like this usually have clear seams and are hollow which makes it a great toy to hack. Using a coping saw we cut this dinosaur along the seam (see below). You could use a box cutter, but a coping saw allowed us to quickly chop this dino in half without fear of breaking a razor blade. This dino also had a tiny hole already visible, so using that to our advantage, we used a screwdriver to widen the hole so we could places the wires for the DC motor through the hole.
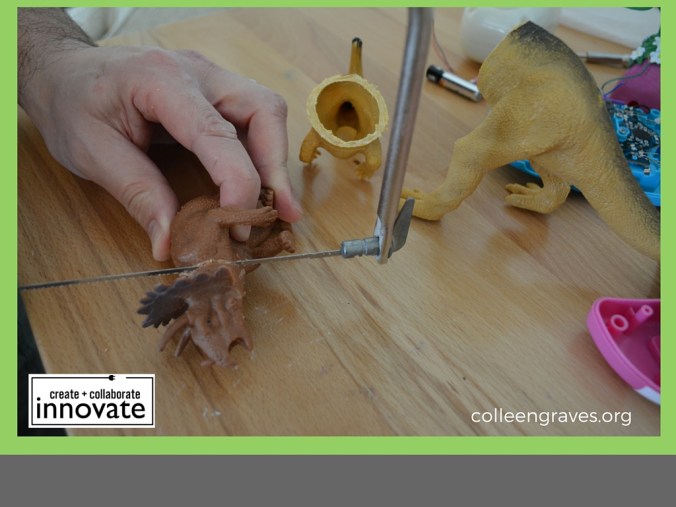
Digging Up Dinosaurs
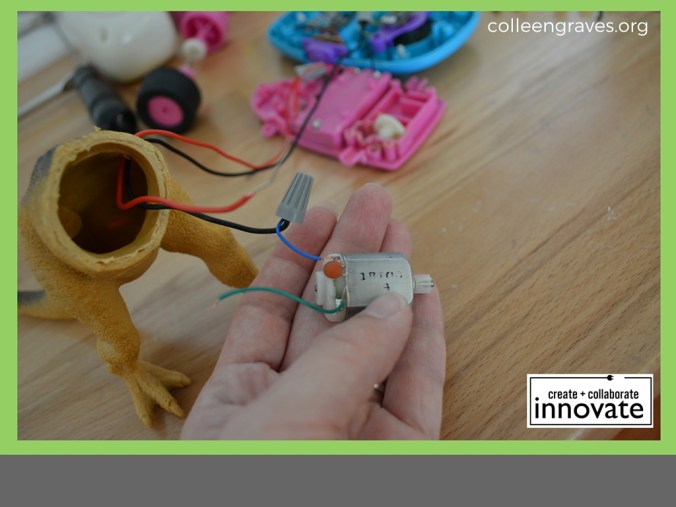
Step 7: Hook-up Wire
We cut about a 6” length of hook-up wire, so we could wire the DC motor to the switch on the car body. Before placing the wires through the hole, make sure you strip the end off so you have about a half inch of exposed wire for making connections. Pull wires through Disco Dino and twist red wire to red wire and cap exposed wires with a wire nut. Connect black wires together by twisting with your fingers and covering with a wire nut. With the exposed ends of your freshly cut hook-up wire carefully placed inside Disco Dino, attach the wires to the DC hobby motor as below. Typically, with a small DC motor like this, the way you power up the wires changes the direction of the motor. So you can’t do it wrong! If you hook up one way your Disco Dino will spin his head to the left and if you hook it the other way, he will spin his head to the right! Go ahead and hook the red wire to one end and the black wire to the other. Make sure your motor will fit in your toy.
Hook Up and Cover Up
Classroom tips: Cover exposed wires with wire nuts, heat shrink, or electrical tape. Keep safety as part of the lesson and do not leave exposed wires exposed when working with children!
Step 8: Hide the Motor
Using popsicle sticks, we made a “seat” for the motor so it can rest in the center of Disco Dino’s tummy. By filling in the gaps with hot glue, you can ensure the motor won’t move around once you turn your dino on. (Because he is going to be DANCING A LOT!)
You’ll also want a sturdy spot inside Disco Dino’s top half. Using a popsicle stick, we made another seat for the piece you will use to hold the head onto the motor. We found a small round piece inside of a VCR that happens to fit our motor almost perfectly. Aaron used his hot glue trick again so that the center of this “piece” would rest comfortably in the center of Disco Dino’s upper body.
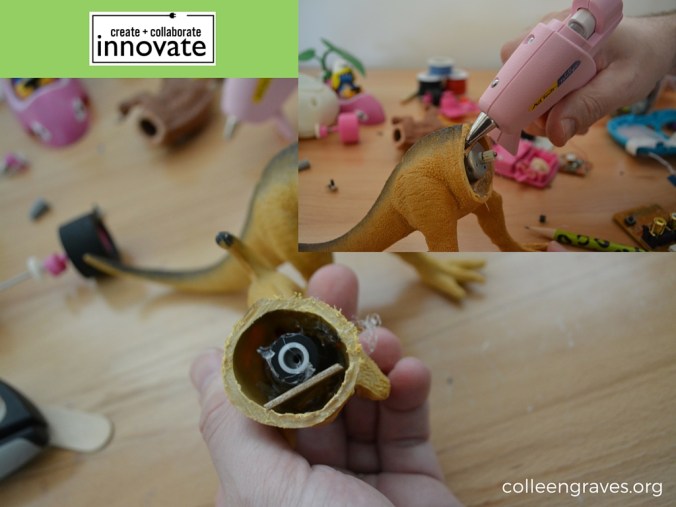
Pop it like it’s hot!
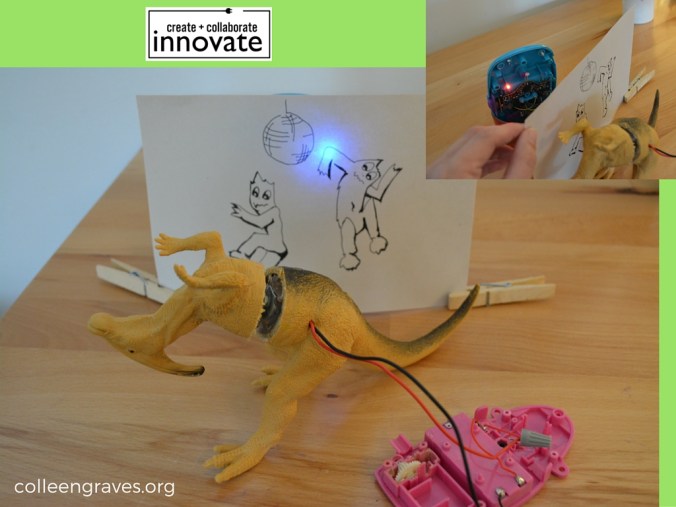
Step 9: Let’s Dance
Will Disco Dino dance? We stuck the top half to the bottom half and flipped the switch on the car body! It works! However, it lacked something. We used the blinking LEDS from the handheld baby toy to create a disco scene for Disco Dino. By holding the blinking toy in place with a roll of duct tape we can hide the electronics behind a disco drawing. Disco Dino is now ready to dance!
Step 10: Make more stuff
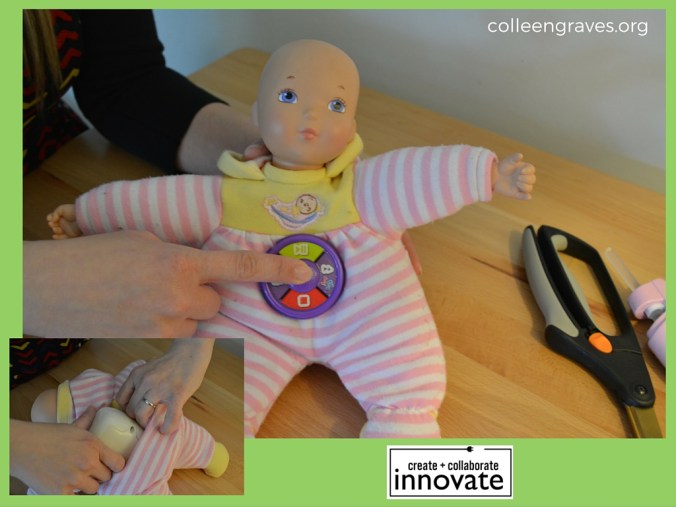
Remember our push button giggle? And the front of our discarded baby cellphone toy? Let’s make one more “frankentoy.” Our 7 YO really wanted to make a giggling blinking robot, but she found a quick fix with this discarded babydoll. We simply cut the back of the doll near a seam so we could insert our giggling electronics (See below). Made room for the giggle box and placed giggling electronics inside. We hot-glued the button from the handheld toy on the front of baby to give users a giggle button! Now when our 7 YO pushes the button and she’s got a great new giggling toy. She never cared for this babydoll before, but she loves it now! You might find giggle buttons like this inside many toys at the thrift store including “Tickle Me Elmo.” Now go find some old toys and make something new!
Challenges:
- What else can you make with the tiny motor?
- What other things could you make with your DC hobby motor?
- Could you wire up Disco Dino’s motor to a different toy so the control is more mobile?
More Resources
- The Tinkering Studio is a great resource for learning more about what they call #toydissection! They host amazing workshops all around the world teaching people how to tinker with everyday materials in new and unusual ways!
- Franketoymobile– A mobile Franken-toy workshop offering free public workshops in Chicago!
- Frankentoy Fridays at The Lemonade Workshop
- Book a Frankentoy Workshop at The Austin Tinkering School
What will you make? Tweet us, leave a comment, or use the hashtag #bigmakerbook to share your creations on our Community Project Page!