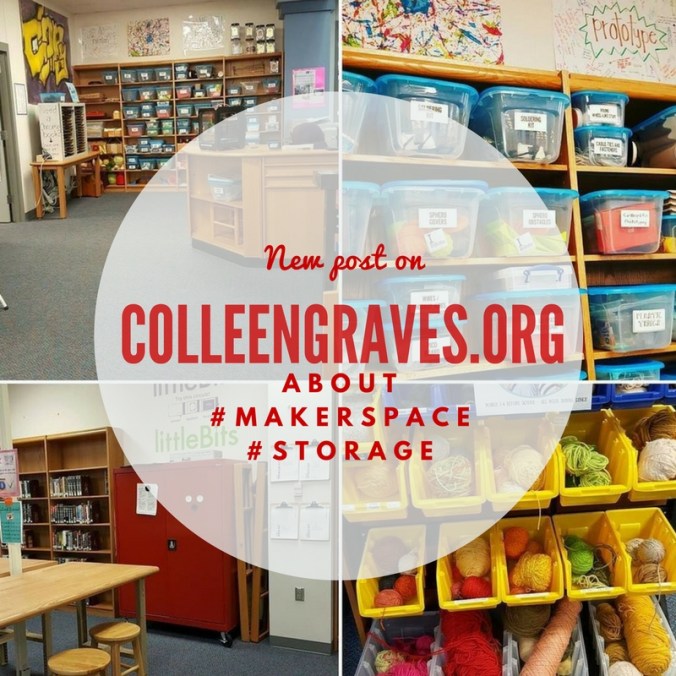
 Last year during our Invention Literacy Research, I realized that I really did need to hyper-organize my maker supplies–especially when it comes to recyclables for prototyping! I’d begun organizing our electronics and other gadgets, but it was clear that everything needs to be clearly labeled to make materials more accessible for all students.
Enlisting Help
I may be a librarian, but I’m not the best at organizing, so I enlisted help from our Instructional Technology Specialist, Leslie Terronez. (Have you seen how awesomely she organized our Chromebooks?) I asked for her assistance in creating a labeling system and showed her the awesomely hyper-organized makerspace materials at Lighthouse Creativity Lab. We both loved the way they organized materials by type. (i.e. soft stuff, fasteners, etc.)
We began moving and inventorying our maker stuff and decided to sort our materials into these main categories: Electronics/ Crafts/ Supplies/ Prototyping/Tools
Since Leslie is an organizing Jedi Master, she decided to organize our labels by type font.
Mrs. Smalley and I began the tasking work of sorting our recyclables and other prototyping items into clear plastic storage bins. (This was after extensive time spent measuring the shelves and going to Staples to see what storage box sizes would best maximize our shelf space.)
Maker Materials and Prototyping Tools
I’d say that 1/3 of my Maker supplies are recyclables. Prototyping materials can range from cardboard tubes to weird round wheel like stuff. Collecting materials like these depend on the types of things your students like to make. Watch their making patterns and gather materials that make sense for their making habits.
You may have a local re-use center where you can find interesting items or just garner ideas for the type of clean upcycling recyclables that work for making. (I just adore shopping at SCRAP Denton. Plus, if my space gets too overrun with reuse materials, I can donate leftovers to this great non-profit!)
Sometimes you won’t know what students need until you start labeling and marking materials. At one point, I was going to recycle some magazines, but decided to bring them up to the library instead. Right after labeling the storage bin, a student had the magazines over at the tinkering tables and was busy utilizing them for a school project.
littleBits
However, organizing electronics is a whole different ballgame.
If you have littleBits and need some ideas, I have a whole Librarian’s Guide to littleBits with tips for organizing, storing, and introducing to new classes. It is available for free download here!
I love these huge cabinets for storing my Pro Library because I can keep Bits organized and locked up if needed. (And as a bonus, if Bits fall, they are still inside this metal cabinet safely away from feet! Thanks for the tip, #superlibrarianhubs! )
Aaron (the one and only #superlibrarianhubs) also has this great sign inside his cabinet that lets students know that to start inventing they have to pick up a power Bit from the circulation desk.
Sphero
Since Sphero robots need to be charged and ready to go, see my previous posts about organizing, circulation, and using Sphero with classes. (and Sphero Obstacle Course Challenge and Participatory Learning)
In Progress Shelf
While it isn’t storage per se, a makerspace isn’t complete without a “Works in Progress” space. At Lamar, I had this space designated for works in progress. It really doesn’t take long for this space to get out of control… so you do have to do some regular maintenance if you see “in progress” projects sitting for a long time. I’m still working on this space at Ryan, (kids are already utilizing it, but it isn’t picture ready…) but I will update this post when it’s ready to share!
Sharing Awesome Student Work
It is equally important to have a space dedicated to sharing awesome student work! I’ve spent the last few years showcasing student work digitally, but I’m now in the process of making a permanent maker display to share what students at Ryan are creating. I’m hoping it will inspire even more students to come to the library to be creative and learn through hands- on experiences. If you haven’t seen my Instagram, I post daily things my students create and other library related madness.
How about you?
What are your plans for makerspace storage? What works for your students? How do you share student work? Please share your ideas in the comments below! 🙂

