
Hypothetical Situation: It’s the end of the school year, and your principal has $1,000 dollars for you to spend on makerspace items from Follett or Mackin, but you have to spend it ALL by next week. What will you order?
First off, I don’t ever like to answer these types of questions for other libraries. One of the reasons a school benefits from having a certified librarian is because the librarian is in touch with the pulse of the school. A librarian should know the school population and be familiar with what teachers teach and what holes in the curriculum makerspace items could fill. If you have time, I’d suggest getting others involved. This quote if from my makerspace tools page:
“Get your students and staff involved and ask them what they want to create. Ask your students and staff what materials they would want in your makerspace. Create a steering committee to help guide your purchases AND your programming. If they don’t know what to get or what to do, show them this list of awesome stuff and make plans together. See what your makers are interested in before making purchases because you do not want to spend money and have items sit on the shelf.”
However, as a librarian, I also know that this scenario happens time and time again. Plus, if it’s on a short time frame, you might not be able to poll students or staff. It’s why I always try to have a backup list of items that I would want to purchase if I happen to be the lucky winner of the year end budget surplus. It doesn’t happen often, but it has happened to me!
This post is answering a request from @DesignMakeTeach and is for the librarians in his school district. I’m including Follett as a resource because most schools have Mackin and Follett as pre-approved vendors and both of these library super vendors have different items available. The items on these lists are organized by categories that should help fill library mission statements and goals. Lastly, since this is based on ONLY having $1,000 to spend, I’m steering away from hefty budget eaters like 3D printers. Use this list like a menu and pick and choose items you think would be appropriate for your school. Want something not on the list? Go for it!
Note: I did not receive any sort of financial compensation from any of these vendors or companies for this post. This is all maker items I am familiar with and would suggest for others if they are interested in learning how to use the equipment. (If you aren’t interested in the equipment. Don’t get it. It will collect dust.) I always suggest that librarians new to making start small and promote activities they feel will most benefit their library programming. You do not have to know everything about a makerspace tool. It’s actually more fun if you learn alongside your students. If either of the vendors had sewing machines, I would also probably add a sewing machine to your list. But only if you think your students would be interested in learning to sew. At my school with limited tech resources, sewing by hand and learning to use our sewing machines, is surprisingly popular. Plus, my library aide enjoys teaching students how to sew and knit!)
Follett Makerspace Items (Under $1000)
Video Production
Green Screen: $100-150 You can use green butcher paper, but a nice green screen isn’t too pricey. Also, they might be a little cheaper from a store like B&H Photo which is also probably approved in your district.
Animation Studio: ($70) If you have iPads on campus, you won’t need something like the Hue Animation Studio, since this should be doable with the Stop Motion app. (It’s FREE!) However, if you want to set up some stop-motion stations like the Bubbler in Wisconsin, it’s a great way to combine making and literacy. Check out their Book Trailer Animations here.
Circuitry
Squishy Circuits: ($10-30) If you want students to experiment with circuits in a reusable fashion, this is a great way to teach an intro to circuits without wasting paper and copper tape. The kit is worth the price for the cool battery pack with test leads, buzzer, and jumbo LEDS. Alternatively, you can use alligator clips with a regular battery holder and no special Play-doh is required. (You can also make your own batches of conductive and insulated dough!)
Chibitronics Educator Pack: ($110) You already know I love Chibitronics! You can get all your Chibi swag at Follett or Mackin. Here is a review of the educator pack that I posted last year. I like to use these for special projects because the surface mount LEDS almost always ensure success! This kit has 90 stickers in it! It’s good for one full class of paper circuits.
Copper Tape from Chibitronics: ($8) You could probably get it cheaper elsewhere (I buy mine in bulk on Amazon), but if this is your only approved vendor for conductive tape, it’s doable! (Or you could buy copper tape as a slug repellent from Home Depot/Lowes, but I am not sure if the adhesive is conductive.)
Conductive Sewing from Brown Dog Gadgets: ($25) This is only an intro kit, so you would have to buy multiple if you wanted to get a few kids started, but this is a decent price for all that is contained in the kit. It’s everything you need to sew your first circuit.
Bare Conductive Electric Paint Tubes: ($10) This is an alternative to pencil lead, conductive thread, wiring, etc. You could use this for paper circuits, painting circuits, or Makey Makey. I prefer the paint tubes to the jar of paint as the jar does have a shelf life after opening.
Coding
Kano Computer: ($150) I wouldn’t get this for high school, but I think is a rad computer for the elementary and lower middle school set. My 8 year old has one and it is chock full of programming options (Sonic Pi, Coding with Minecraft, etc.) Yes, it’s just a Rasberry Pi, but the Kano OS and included speaker and keyboard make it worth the price.
Bloxels Team Builder Pack: ($250) I have not used Bloxels yet, but I finally broke down and bought a set for my students who don’t seem to wanna program games in Scratch. (I LOVE SCRATCH PROGRAMMING!) But this seems like a pretty cool intro into getting kids into making their own games. Only time will tell! (Read Kristina Holzweiss’s review here.)
Robots
Bristlebot Pack: ($100 for 25 students) I love bristlebot projects, so even though this is a bit pricy, if you are new to the concept, this is a way to get enough to make a class set of tiny robots. However, I’d probably hack a dollar store toothbrush and go a little bigger. (That’s a project in our #bigmakerbook!)
Wonder Workshop Pack: (Dash – $150, Dot $50, Pack with accessories $279) I actually think for learning to program a robot, Dash is one of the most fun robots! You can program Dash to sing, dance, race, etc. Dot is okay, but it doesn’t move. It is mostly used as a sensor so that Dash and Dot interact.
Prototyping
K’nex Kits: ($25-150 and up) I always ask for students/teachers if they have old K’nex to donate. However, if you needed some to for quick kits for prototyping, you can now get them from Follett.
K’nex Simple Machines Deluxe: ($374) This is a MASSIVE kit of K’nex! So many things could be built from it! I don’t think I have anywhere this amount of K’nex, but if I taught elementary, I’d love to have this set!
Tools
Electronic Technician Toolkit ($70): Nice small tools (with storage kit) for electronics. Includes a soldering iron with a holder.
Starter Sewing Supply Kit from Brown Dog Gadgets ($5) Thread, measuring tape, scissors, pins, everything you need to make a stuffie! (Except the stuffing!)
Mackin Makerspace Items (Under $1000)
Circuitry
Squishy Circuits: ($30-61 / Standard vs Deluxe kit) If you want students to experiment with circuits in a reusable fashion, this is a great way to teach an intro to circuits without wasting paper and copper tape. The standard kit is worth the price for the cool battery pack with test leads, buzzer, and jumbo LEDS. Alternatively, you can use alligator clips with a regular battery holder and no special Play-doh is required. (You can also make your own batches of conductive and insulated dough!)
Chibitronics Educator Pack: ($110) You already know I love Chibitronics! You can get all your Chibi swag at Follett or Mackin. Here is a review of the educator pack that I posted last year. I like to use these for special projects because the surface mount LEDS almost always ensure success! Mackin also has stand alone chibi sticker LED choices.
Elenco LED Assortment: ($19) 80 LEDS! Combine with copper tape, conductive paint, conductive thread, hook up wire, etc and your students can play with circuits.
Midwest Electronics Tool Box Kit: ( $400) Lots of great tools! I probably wouldn’t get this if I ONLY had $1,000 to spend, but it’s something to remember if you need to get lots of tools for take apart and building purposes. (I actually bought the other cheap $80 kit from Follett. My other tools I bought from Harbor Freight.)
Makey Makey Classic: ($51) You already know I LOVE Makey Makey so much I wrote lesson plans, and a whole book of projects with my #superlibrarianhubs. If you can afford a class set, get the STEM pack. Otherwise, buy as many as you think you can use to get your students into physical computing!
Makey Makey Inventor Booster Kit: ($16) I love these booster kits! They have conductive fabric tape, art pencils, extended wires, and a small piece of conductive fabric. Just one won’t be enough for a library, but you might just want to buy one so you can learn more about extending your circuits for Makey Makey. (I use this conductive fabric tape for sewing project as well.)
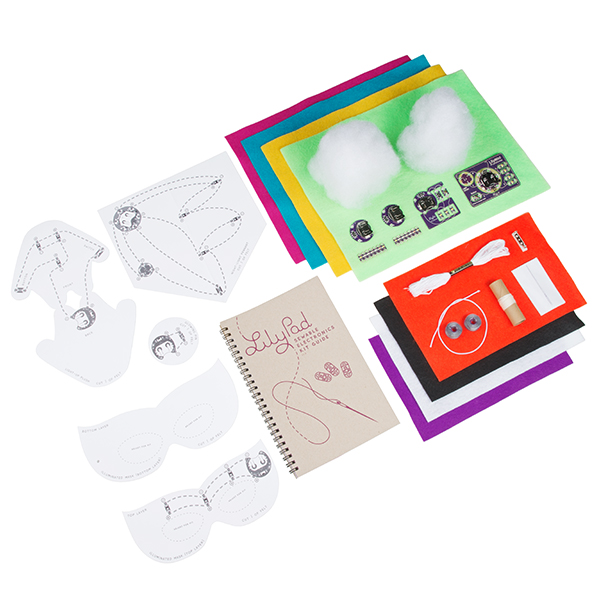
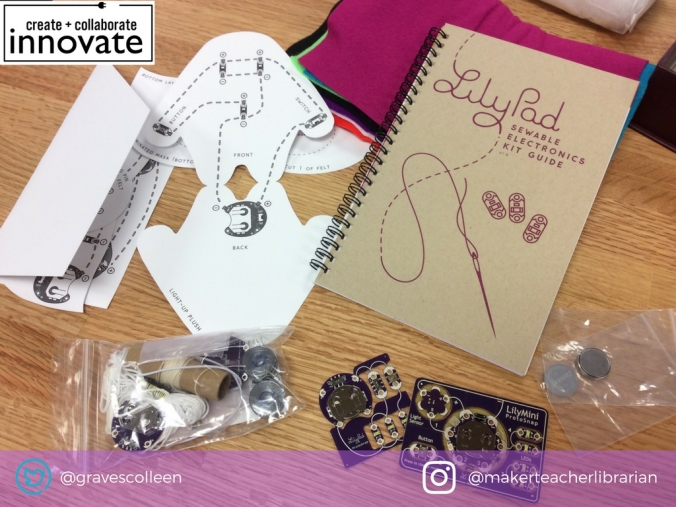
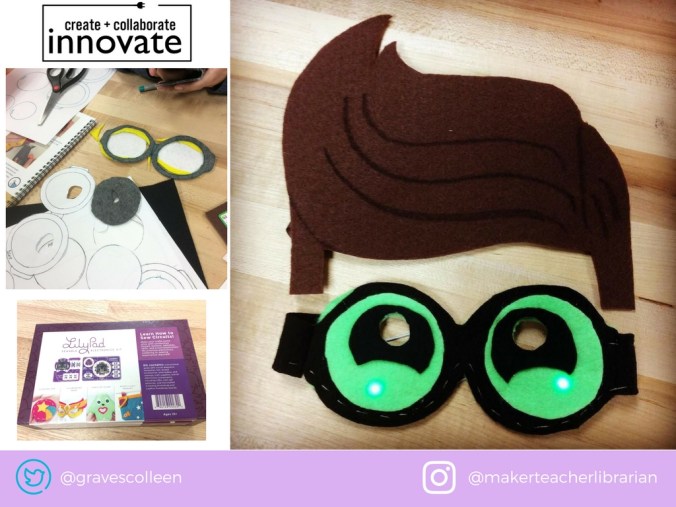
SparkFun Protosnap Lilypad E-sewing Kit: ($25) This is the kit that sparked my own love of sewing circuits! (See post here.) This is only good for one student, so you’d have to buy multiple kits. (Which could get pricey. I prefer to buy my thread separately and 3D print battery holders.)
Coding/ Robots
Scratch: (Free) I know this isn’t an item you can buy. However, it is one of the best free coding resources available for students that are interested in coding (but maybe aren’t quite ready to get into programming languages like Python, Processing, C++, etc). You also might want to stock up on some Scratch books. (And our Makey Makey book will have a lot of Scratch tutorials in it to boot!)
Bloxels: ($257) As mentioned in the Follett list, I don’t have these yet, but I am hoping they are a good resource for hands on learners who want to develop their own games.
Hummingbird Robotics: ($163-267 per set) I love this open-ended robotics resource! Students can make cars, robots, animatronics, and tinker with block programming or even Arduino coding! (It’s a little hard to find on the Mackin site because they have the word hummingbird separated. It is listed as: BIRD BRAIN HUMMING BIRD ROBOTICS DUO BASE KIT )
Sphero/Ollie : ($140/$115) I like the new Sphero, but if you want to focus on programming, I prefer Ollie (plus it’s cheaper.) I reviewed these bots last year here.
Wonder Workshop Dash/Dot: ($153/ $51) I actually think for learning to program a robot, Dash is one of the most fun robots! You can program Dash to sing, dance, race, etc. Dot is okay, but it doesn’t move. So it is mostly used as a sensor so that Dash and Dot can interact.
Prototyping
K’nex: ($41-300) I always ask for students/teachers if they have old K’nex to donate. However, if you needed some to for quick kits for prototyping, you can now get them from Mackin too.
LEGO Large Creative Box: ($61) LEGO! I’d buy a few of these. I dig building stuff with LEGO. Now if only Mackin could carry some LEGO gears and motors so I can get more supplies for #LEGOtinkering.
Makedo Safe Saw/Makedo Kit: ($12-$50) For lower ES, you might like the Makedo Safe Saw for cutting boxes. You could try the full kit with screws and washers, but I don’t know how helpful it would be for little builders. My own elemaker was never that into building with these. (But we both loved the safe saw for cutting cardboard.)
Scotch Multi-Use Duct Tape: ($7) I like to get duct tape for prototyping, but you could also buy some for making duct tape crafts.
Painter’s Tape: ($7) This is a great low adhesive tape for making robot mazes!
Electrical Tape: ($1.50) Good to have if your students are getting into wiring electronics or tinkering with Makey Makey.
There are other good items that might work for your school from both vendors, but if I ONLY had $1000 to spend, I’d focus on getting things I could promote in one school year. I love littleBits, but I would want a bigger budget to include them in this hypothetical situation. Also not included in this list is Snap Circuits. My middle schoolers enjoyed Snap Circuits and your students might too! I’d only suggest them if you just want your students to learn about circuits, but maybe not build open-ended projects with circuitry.
I’d love to hear about your own makerspace short lists in the comments below.
Didn’t win the lotto on the extra budget surplus? Need some ideas on how to get funding? Read my makerspace buy-in post here.


 My next project was to make some fan art in the form of an embroidered/illuminated Schwartz ring in honor of my favorite movie, SpaceBalls. I re-programmed the LilyMini, embroidered a Yogurt fist with ring, but stalled out in the final steps of the project because we were moving. So that project is still in progress, but I’ll share it when it’s finished.