Programmable Paper Circuits Workshop at ISTE with Chibitronics

colleengravesposts (22).png

ISTE Workshop

I spoke with Jie Qi today to talk about her plans for the Chibitronics Love to Code workshop I’m helping her with at ISTE this summer.

YOU NEED TO SIGN UP FOR THIS WORKSHOP!

Because if you attend, you’re going to be one of the first #edtech teachers to have access to her and Bunnie’s awesome new Arduino board that you can program with your PHONE or a Chromebook! (No software downloads for the Arduino IDE! HOORAY!)

In this 3 hour workshop, you’ll learn to craft paper circuits, learn about Arduino coding, and make something pretty rad you can show off to all of your friends.

So why haven’t you signed up yet?

Why Paper Circuits?

Okay, so you might be thinking, why paper circuits? I still remember my first adventure with Arduino at the Denton Public Library. I was so baffled at wiring things to a breadboard and then writing my first code. It was a lot to take in: reading circuitry diagrams AND learning to write code. (Read another post about getting started with Arduino here.) When I tried using Arduino with students at Lamar, I usually only had my students tinker with code or attempt to wire up a project, I felt like introducing both at once would be too confusing.

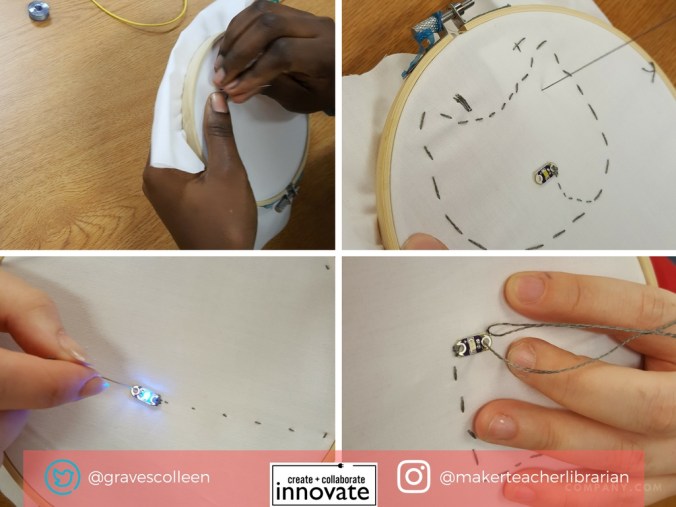
Then something magical happened. I started a club for my middle schoolers with the Chibitronics Circuit Sticker Notebooks. I learned all about simple and parallel circuits alongside my Circuit Girls. Then I started sewing circuits and programming Lilypad Arduino projects. And suddenly, all of that wiring on breadboards MADE SENSE to me! The tangible nature of laying out a circuit just made it all click for someone visual (and hands on) like me.

So for teaching students new to to these concepts, I like to start with paper circuits before moving to sewing circuits. (And if they are interested, THEN we get to move into programming. However, if you just want special effects and aren’t ready to program, the Chibitronics Effect Stickers are another alternative for adding new ideas to your projects!)

Why Program Paper Circuits?

You still might be asking, why program paper circuits? I can already program with a regular Arduino. What makes programming paper circuits special? Well, I think there are a couple of things about programming paper circuits that are amazing.

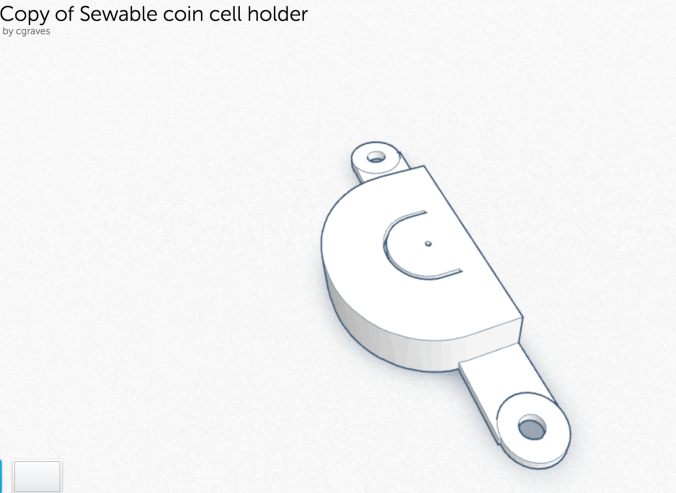
  1. Some students follow and create Arduino projects, but never really grasp how to get a project off of a breadboard and into the real world. Programming paper circuits could get your students thinking about real world applications. Plus, it’s like creating your own PCB out of paper and copper tape! How cool is that?
  2. Being able to clip an Arduino board onto a paper circuit makes computational tinkering much more accessible than hard wiring/breadboarding/soldering a project!

I’m excited for this board to come out and buy a class set for my library. Plus, I’m stoked to see what other teachers’ students do once they get hands on experience with coding and wiring components with the Chibitronics Love to Code board.

This new Arduino board from Chibitronics is going to make it even easier for students to understand how a microcontroller works and how they can “wire ” it themselves. 
If you want to learn more about programming your own paper circuits, sign up for this awesome workshop in San Antonio at ISTE this summer. You won’t regret it!

Link to ISTE Workshop!

(See my previous post about using this board for light-up poetry.)

Here’s a run down of all the sessions I’m involved in at ISTE:

June 24- 28: ISTE , San Antonio, Texas

ISTE_Badge_Presenter_2017

An Intro to Sewing Circuits Affordably

colleengravessewing1

Paper Circuits to Sewing Circuits

In our #bigmakerbook, I suggest crafting with paper circuits to learn about simple and parallel circuits before delving into sewing circuitry. Last year, my GirlsinTech campers had a great time with paper circuits, but when we began to explore sewing circuits, they ran into many roadblocks. Some had never sewn before, some couldn’t thread the needle, some had pre-conceived ideas about sewing that led to disastrous short circuits, etc. (Note: I did have great success with teaching a parallel circuit bracelet at the DPL, but I also had 3 extra helpers for that workshop!)  So I wanted to try something new this year to get students started sewing and creating circuitry knowledge, but still keep the project simple. I wanted to share that project with you, and give you a list of some of my favorite sewing electronics books that aided me in my own journey to learning about creating and debugging soft circuits.

Keeping it Simple

Last year my students learned about circuits with paper circuits and jumped right into sewing parallel circuit bracelets. Instead of sewing a parallel circuit first this year, I wanted my students to really learn and understand the concept behind sewing a circuit. (Plus, I really want students to be able to go further throughout this year with soft circuits and programming.) Lastly, I wanted their learning to be really visible AND I wanted to make it a really easy project if they had never hand sewn, but still appeal to an expert.

In talking with Josh Burker about some ideas for our workshop during the PineCrest Innovation Institute (info in upcoming post!), I’d thought about adding a sewing circuit element to a workshop. My idea was to share a simple circuit template in an embroidery hoop and let participants add their own artistic flair around the light with fabric paint, markers, embroidery floss, etc.

A few days after our conversation, I realized that this would be a great way to start my club that is focused on learning sewing AND learning about electronics. I wanted to keep it simple by just teaching them how to hand sew with conductive thread (on white fabric so they can see their stitches!) and then each tips on embroidery techniques so my students can design with thread.

I made my own example, but only created the circuit and left my embroidery half-baked. I did this because this summer when I was knee deep in LEGO tinkering, I was struck by a tweet from Ryan Jenkins of the Tinkering Studio. This tweet stressed the importance of creating a “half-baked” idea or prototype because this would “invite participation” more than a fully baked idea that might not “instigate” a learning experience. Ryan and I spoke at length about this concept when I interviewed him for Challenge-Based Learning in the School Library Makerspace.

https://twitter.com/ryanejenkins/status/733163614408859649

I realized that up to this point, I had made some half- baked prototypes on the fly just trying to get my kids interested (and it worked so well!), but then I’d started fully baking some prototypes which did not always lead to student participation.

As Patrick Ferrell of Harris County Public Library added, these half-baked examples get our patrons thinking they can not only make their own, but make one even better!

Below is my simple circuit with a couple of embroidery stitch examples.  I’m hoping to turn it into a cute spidery monster head with a glowing eye.  I promoted the heck out of the club, added new students to my Remind and hoped they would show up Thursday after school! As I was gathering my supplies, I realized I needed more coin cell battery holders.

colleengravessewing2

Affordable Battery Holder

Since the cheapest coin cell battery holder to buy is two dollars a unit, I decided I wanted to try and make my own battery holder to keep costs low for my club. I found this great tutorial on sewing your own battery holder , but I didn’t have any neoprene fabric, and I was unsure about the safety of creating a battery holder with a different material.

I looked on Thingiverse and found this battery holder then uploaded it to Tinkercad for hacking. If you know much about me, you’ll know that I’m not really that into 3D design. So I messed around and added some ends for conductive fabric tape, and attempted a sewable hole. The first one I made, the battery didn’t fit. So I did some measurements and tried again. I used my new favorite tool conductive fabric tape from the Makey Makey Inventor Booster Kit to function as the battery tabs. It worked! I fabricated my first useful 3d printed thing and I was ready to manufacture! 🙂

It worked well for my students, but I realized I really did need to make a better hole for sewing each tab to the fabric. I asked for expert help from one of my favorite makers….

Thanks to Aaron Graves for helping me make this file presentable! (He helped me adjust the “thing” to the workplane, re-taught me about aligning shapes, and helped make the holes sewable!) Feel free to hack, reuse, and make your own!

Screen Shot 2017-01-20 at 2.16.11 PM.png


Update 1/20: I’ve since updated this battery holder so that it can be sewn as part of the project and resemble a pirate eyepatch!

https://tinkercad.com/embed/b2bI4iwkJy9?editbtn=1
Screen Shot 2017-06-27 at 7.12.08 AM.png

What Students Made

At our first meeting, we were a small, but mighty group! Which was a really good thing, because all of the girls were successful in sewing their first circuit!

colleengravessewing3

Plus, my half-baked prototype worked swimmingly! The girls did not even follow my pattern for sewing a simple circuit, they forged their own paths. Like any great maker project, some students created simple designs, and others who were already knowledgable with sewing, took it further. One even sewed a cat with her conductive thread! I had to teach her about insulating threads on the fly. Another student decided to try and hide most of her circuitry and is already skilled at embroidering and ready to create her own artistic monster/robot/idea.  Overall it took them about an hour to sew a simple circuit.

The girls happily displayed their projects on the project shelf and asked if we can meet every week! (I have students store projects like these at the library so I can help with debugging as needed.)

colleengravessewing4colleengravessewing5

Embroidery Stitches

Now that they’ve sewn their first circuit, I’m going to teach club members different stitches so they can add their own creative ideas to their work using this great tutorial for learning different types of stitches. The circuit is important, but I’m excited to see how this gets them creatively stitching and inspires them to design art with thread.

Great Resources for Sewing Circuit/Soft Circuit/E-Textile

If you are new to sewing circuits and are looking for more resources, here are a lot of things that guided me along the way. Read my past post about teaching a sewing circuit class at the Denton Public Library.  Plus, our Big Book of Makerspace Projects has a full chapter of sewing circuits that range from very simple to very complex!