Makerspace Storage Solutions

Colleengraves.org (13)

I’ve had a lot of questions about storage for maker tools, so I wanted to compile a list of maker storage solutions I’ve tried over the years.

Microcontroller Storage Solutions

Arduinos, Micro:bit, and Makey Makey are awesome tools, but they don’t come in user or library friendly storage containers. Lately, I’ve been buying photo storage boxes to contain my microcontrollers in a compact and clear solution. What I love about these Iris photo keepers is that 6 of the the containers fit inside another clear unit. Plus, you can easily spot that you have your Makey Makey, alligator clips, and USB cable when students hand the kits back.

If you have some old clear VHS cases, they are also perfect for storing Makey Makey and accessories! I saw Diana Rendina do this at FETC last year, and I almost looked for back stock so I could put all of my Makey Makeys in old VHS boxes!

However, you might want to store things like Play-doh inside your Makey Makey kits, if so a larger storage box works great too. Check out Bill Steinbach’s storage solution:

I’m use these photo boxes to store table supplies for workshops too. Below is a kit for creating paper circuits during a Makey Makey Invention Literacy workshop. These little boxes are great for storing rolls of copper tape, drawing pencils, foil, batteries, and coincell battery holders.

The Iris Photo Keeper sized 4X6 is also good for Micro:bit and accessories.  This size is perfect for the cable, controller, and battery holder. If you want to store more accessories, you’ll want to go a box size up.

Consumable/Recyclables Maker Storage

At Ryan High School with the help of my ITS, Leslie Terronez, we organized all of our materials in these large tubs and labeled accordingly. (See more about the process in this previous post.)

These tubs helped students find things quickly.  I ended up moving all of this organized chaos to the “maker classroom” side of the library at Ryan, and then used these huge shelves behind the circulation desk for “in-progress” projects. During our Invention Literacy projects with 10th grade, I quickly realized that I need to move our consumables far away from our non-consumable items like knitting needles, Raspberry Pi components, etc. I needed all recyclable and prototyping material far away from things I didn’t want torn up. During that project, students sawed knitting wooden needles in half to make catapults!  I didn’t get upset with them for their creative reuse, but oh my! If only I’d remembered Krissy Venosdale’s Maker Confession we’d discussed at SXSWedu last year!

At my new library, I have mostly only recyclables and and consumables. So I keep my Micro:bit and Makey Makeys near our computers and I have a wall of recyclables clearly labeled for students to use in projects. I’ve also learned to cut my cardboard into square and rectangle sheets so it’s a little more accessible for my elemakers.

It’s handy to save round things in a bin labeled “round-wheel like things”, cardboard tubes, interesting plastic, soft things, pom poms, straws, popsicle sticks, etc in your consumable area. However, with younger students remember to tell them not to be wasteful. You may even have to limit how many materials they can use. During our Micro:bit pet project, Mrs. Honea and I saw the kids decimate all of my sorted reuse materials in 2 minutes! Plus, they only gathered them all and then had to put them back. It’s important for students to understand that they do not have HOARD materials because they will stay in your storage tubs for further use.

Storing Works In Progress

Last year I noticed that it was getting harder to keep “in progress” projects organized on the shelves. So I decided to buy tubs that students could label with their names and an expiration date. If they were working on a project of their own, they needed to write an expiration date. If they were working as a class, they just needed to label the tub with their names. At Ryan I kept these behind the circulation desk. At my new school, I keep in progress projects on empty shelves in my office so idle hands do not find them and destroy them. Read more about the in-progress shelves in this post I wrote last year.

During the “works in-progress” clean up, I also tried out making a re-purpose it bin. This seemed like a good idea for repurposing old projects, but not many of my high school students would go through it to look for parts. It might work better in elementary, since the kids really love scavenging items. Only time will tell!

The red tubs work great for in progress work when I have one whole class working on a project. For open maker time projects, these little containers with lids work a little better. An expiration date is necessary for free lance projects because sometimes kids abandon projects for a long time. I can’t tell you how many times a students would come back months after they started a project. It’s always difficult to tell them you’ve recycled their work, but it becomes a little easier when you have an expiration date on the bin!

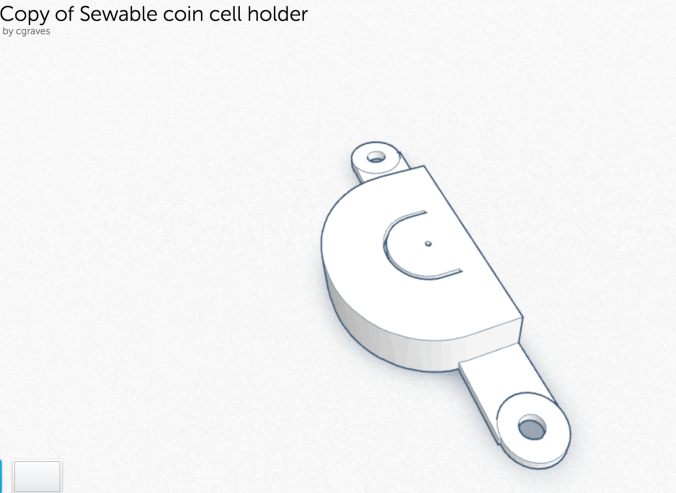
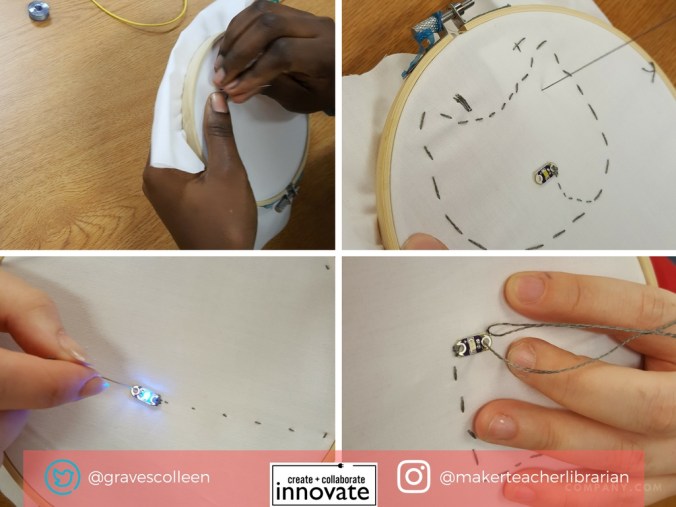
Skinny containers with lids are great for storing sewing and sewing circuit projects!

Throwback to Lamar Middle School

I started the in-progress shelves when I was working at Lamar. At the time, it was just empty shelving for student projects. When I stored projects like this at Ryan, inevitably someone would mess with another student’s project. That’s why it’s important to use bins or storage tubs to keep work separated and safe.

Need More Ideas for Makerspace Storage?

Visit your local re-use stores to get more great storage ideas! Scrap Denton had great ideas for re-purposing old containers for consumables supplies. At Ryan, I used biscotti tubs that a teacher gave me to store consumables like popsicle sticks and wooden dowels. To keep your area looking neat, make sure your up-cycled containers are all matching! You can reuse tennis ball containers for ribbons, popsicle sticks, etc! While you are at your re-use store, be environmentally friendly by picking up more supplies for your makerspace instead of buying all brand new materials.

Pinterest always has great one trick ideas too! I found this great way to organize thread by hot gluing golf tees to the top tub of tool box drawer.

What are some of your favorite storage ideas? See my previous post about makerspace storage for ideas on storing littleBits, Sphero, and more!

An Intro to Sewing Circuits Affordably

colleengravessewing1

Paper Circuits to Sewing Circuits

In our #bigmakerbook, I suggest crafting with paper circuits to learn about simple and parallel circuits before delving into sewing circuitry. Last year, my GirlsinTech campers had a great time with paper circuits, but when we began to explore sewing circuits, they ran into many roadblocks. Some had never sewn before, some couldn’t thread the needle, some had pre-conceived ideas about sewing that led to disastrous short circuits, etc. (Note: I did have great success with teaching a parallel circuit bracelet at the DPL, but I also had 3 extra helpers for that workshop!)  So I wanted to try something new this year to get students started sewing and creating circuitry knowledge, but still keep the project simple. I wanted to share that project with you, and give you a list of some of my favorite sewing electronics books that aided me in my own journey to learning about creating and debugging soft circuits.

Keeping it Simple

Last year my students learned about circuits with paper circuits and jumped right into sewing parallel circuit bracelets. Instead of sewing a parallel circuit first this year, I wanted my students to really learn and understand the concept behind sewing a circuit. (Plus, I really want students to be able to go further throughout this year with soft circuits and programming.) Lastly, I wanted their learning to be really visible AND I wanted to make it a really easy project if they had never hand sewn, but still appeal to an expert.

In talking with Josh Burker about some ideas for our workshop during the PineCrest Innovation Institute (info in upcoming post!), I’d thought about adding a sewing circuit element to a workshop. My idea was to share a simple circuit template in an embroidery hoop and let participants add their own artistic flair around the light with fabric paint, markers, embroidery floss, etc.

A few days after our conversation, I realized that this would be a great way to start my club that is focused on learning sewing AND learning about electronics. I wanted to keep it simple by just teaching them how to hand sew with conductive thread (on white fabric so they can see their stitches!) and then each tips on embroidery techniques so my students can design with thread.

I made my own example, but only created the circuit and left my embroidery half-baked. I did this because this summer when I was knee deep in LEGO tinkering, I was struck by a tweet from Ryan Jenkins of the Tinkering Studio. This tweet stressed the importance of creating a “half-baked” idea or prototype because this would “invite participation” more than a fully baked idea that might not “instigate” a learning experience. Ryan and I spoke at length about this concept when I interviewed him for Challenge-Based Learning in the School Library Makerspace.

I realized that up to this point, I had made some half- baked prototypes on the fly just trying to get my kids interested (and it worked so well!), but then I’d started fully baking some prototypes which did not always lead to student participation.

As Patrick Ferrell of Harris County Public Library added, these half-baked examples get our patrons thinking they can not only make their own, but make one even better!

Below is my simple circuit with a couple of embroidery stitch examples.  I’m hoping to turn it into a cute spidery monster head with a glowing eye.  I promoted the heck out of the club, added new students to my Remind and hoped they would show up Thursday after school! As I was gathering my supplies, I realized I needed more coin cell battery holders.

colleengravessewing2

Affordable Battery Holder

Since the cheapest coin cell battery holder to buy is two dollars a unit, I decided I wanted to try and make my own battery holder to keep costs low for my club. I found this great tutorial on sewing your own battery holder , but I didn’t have any neoprene fabric, and I was unsure about the safety of creating a battery holder with a different material.

I looked on Thingiverse and found this battery holder then uploaded it to Tinkercad for hacking. If you know much about me, you’ll know that I’m not really that into 3D design. So I messed around and added some ends for conductive fabric tape, and attempted a sewable hole. The first one I made, the battery didn’t fit. So I did some measurements and tried again. I used my new favorite tool conductive fabric tape from the Makey Makey Inventor Booster Kit to function as the battery tabs. It worked! I fabricated my first useful 3d printed thing and I was ready to manufacture! 🙂

It worked well for my students, but I realized I really did need to make a better hole for sewing each tab to the fabric. I asked for expert help from one of my favorite makers….

Thanks to Aaron Graves for helping me make this file presentable! (He helped me adjust the “thing” to the workplane, re-taught me about aligning shapes, and helped make the holes sewable!) Feel free to hack, reuse, and make your own!

Screen Shot 2017-01-20 at 2.16.11 PM.png


Update 1/20: I’ve since updated this battery holder so that it can be sewn as part of the project and resemble a pirate eyepatch!

https://tinkercad.com/embed/b2bI4iwkJy9?editbtn=1
Screen Shot 2017-06-27 at 7.12.08 AM.png

What Students Made

At our first meeting, we were a small, but mighty group! Which was a really good thing, because all of the girls were successful in sewing their first circuit!

colleengravessewing3

Plus, my half-baked prototype worked swimmingly! The girls did not even follow my pattern for sewing a simple circuit, they forged their own paths. Like any great maker project, some students created simple designs, and others who were already knowledgable with sewing, took it further. One even sewed a cat with her conductive thread! I had to teach her about insulating threads on the fly. Another student decided to try and hide most of her circuitry and is already skilled at embroidering and ready to create her own artistic monster/robot/idea.  Overall it took them about an hour to sew a simple circuit.

The girls happily displayed their projects on the project shelf and asked if we can meet every week! (I have students store projects like these at the library so I can help with debugging as needed.)

colleengravessewing4colleengravessewing5

Embroidery Stitches

Now that they’ve sewn their first circuit, I’m going to teach club members different stitches so they can add their own creative ideas to their work using this great tutorial for learning different types of stitches. The circuit is important, but I’m excited to see how this gets them creatively stitching and inspires them to design art with thread.

Great Resources for Sewing Circuit/Soft Circuit/E-Textile

If you are new to sewing circuits and are looking for more resources, here are a lot of things that guided me along the way. Read my past post about teaching a sewing circuit class at the Denton Public Library.  Plus, our Big Book of Makerspace Projects has a full chapter of sewing circuits that range from very simple to very complex!