“You’re on Candid Camera!”
One of the first lessons I brainstormed for Makey Makey was the ELA Candid Camera Lesson. In the beginning, I only had a loose idea of creating a candid camera that students would activate via a switch. I thought it would be fun to take candid pictures and then tell a story later on based on the “found” images from the classroom. Don’t take this the wrong way and set up a secret camera in your classroom. Students will need to construct it and KNOW that it is there! I love the idea of letting students create GIFs with whiteboard scraps and reviewing books this way. Or even creating stop motion animation!
Reenactment Strategies
I wanted to take the lesson further though, so I thought back to my time in the ELA classroom and some great “Deepening Comprehension Strategies” from educator Jeffrey Wilhelm. My Language Arts students THRIVED when they acted out stories, sat in the hot seat, or acted like experts. I loved how silly and fun they would get when reenacting with the “tableaux” strategy.
In this Makey Makey lesson, tableux meets technology and students create personal photo booths to make GIFs of acted out plots, vocabulary, or other narrative elements.
Incorporating the Lesson – Maker Style
Fast forward to this school year, I was stoked to hear that some of my new ELA teachers were using tableux to understand and re-emphasize the plot structure in “And Then There Were None.” So I shared my GIF station lesson idea, and Mrs. B and Mrs. F were ready to bring their classes to the library.
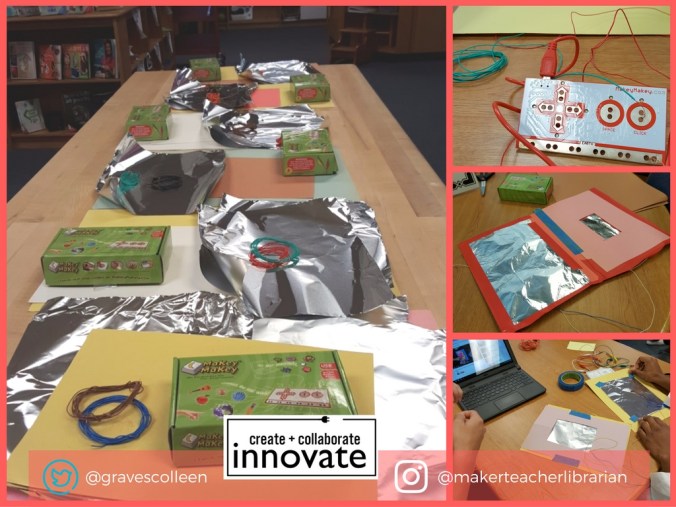
While I would love to have time to teach all of the students how to strip telephone wire for Makey Makey, I realized that we wouldn’t have enough time to do this AND create our GIF stations for tableux. (After all, what was important in the lesson? Stripping wire? Or solidifying narrative concepts?) Instead, I enlisted my student aides to strip old telephone wires and Ethernet cables and gather supplies for our classes. My aides prepared supplies for each group:
- Two long strips of telephone wire- with ends stripped
- Two pieces of aluminum foil
- One long piece of construction paper
- One half sheet of construction paper
- One Makey Makey Kit
- Low adhesive tape
Hands On Learning
While you could explain how to create a switch with Makey Makey and tell students what to do….. it’s a little more fun and a little more engaging to let them figure it out and problem solve a bit. So, I had groups grab a Chromebook and navigate to my Youtube video below. I also kept a finished “GIF station” example available for them to look at if they got stuck. As with most maker activities, some groups got it quick and others required a little more assistance. I stayed nearby to help groups that got stuck and I prompted students to debug what was wrong as needed.
Debugging
If you try this yourself, your students will probably run into these problems:
- Making constant connections in the DIY switch
- Too big of a hole in the middle paper
- Foil taped too loosely
- Foil pieces touching on the inside of the fold
- Camera not activating
- It only works like a “click” so make sure to hover over the camera click!
- Connectivity issues
- Some students don’t realize that the copper wiring is what needs to be taped to the foil!
- Always have students double check which pins they clipped alligator clips to!
- Make sure one wire is connected to earth! Stay grounded!
- Be sure they’ve plugged in the USB! (You’d be surprised how many times I’ve personally forgotten to do that!)
Tableux and GIF
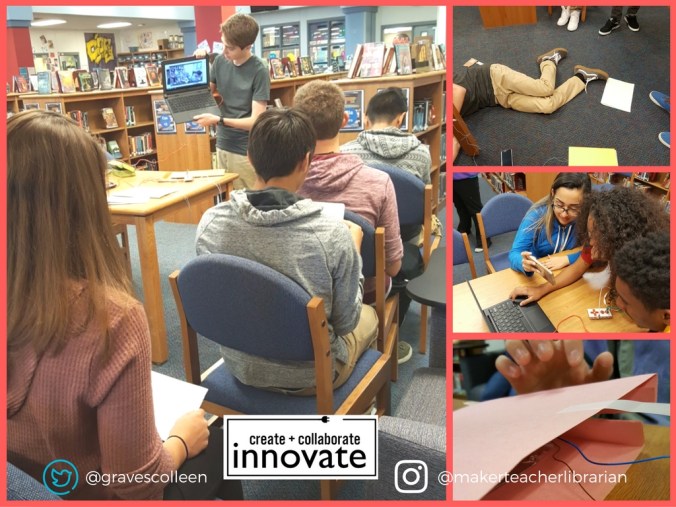
Once their GIF stations were made, students spread out around the library and reenacted their scenes and took pictures. The GIF stations made it so that all of the students could be a part of the reenactment. Some groups enlisted even more help by working together and the students thought their pictures were so funny, they took snapchats of their Chromebook scenes. Creating the GIF from the pictures on the Chromebook proved to be taxing since GIFPAL is blocked at our school, but the Makey Makey personal photo booth was a success!
Go Further
What else can you do with a personal photobooth? Mrs. Richmond decided to make a “Checkout Selfies Station” so students could show off what they checked out!

Pingback: The MakerEd 100 'Must Do' List - Making is Elementary